Category Archives: Microsoft Azure

Azure Backup File – iSCSI Error

When using the file recovery feature of Azure Backup I encountered an error when trying to mount the recovery point.  I ran the exe from the Azure Portal using an elevated command prompt, but received the error “Exception caught while connecting to Target.  Please retry after some time.”

AzureBackup0

It turns out that the error is caused by the use of the elevated command prompt.  When right-clicking on the exe and choosing “Run as administrator” the error doesn’t occur.

AzureBackup1

Azure N-series VM BSOD

When creating an Azure NV6 VM with Windows 10 the VM blue screened when installing the NVIDIA GRID drivers (411.81) either through the Azure extension, or manually as per the guidance here.  The blue screen error was System Service Exception for nvlddmkm.sys.

I discovered that the issue was specific to Windows 10 1809 as when I installed the drivers on Windows 1803 the error didn’t occur.  It’s likely that 1809 will be supported in a newer driver.

Azure IaaS Cost Optimisation

When talking to people about Microsoft Azure one of the biggest concerns is cost management and how to avoid runaway spend.  In this post I’ll share my tips for optimising Azure expenditure.  In my organisation I’ve used these tips to reduce Azure expenditure by around 50%.

Right size CPU

If you use the Azure portal to create a Windows Server 2016 VM, the default size as of Nov 18 is a DS1 v2 which costs £72.36 a month in West Europe.  If you don’t take the time to check what’s the most appropriate VM series and size you could be paying more than you need to, or under sizing your VM.  If you’re running a low end production server, or dev/test server, you could use a B series VM such as a B2S, which costs £35.26 a month.  In this case you’ve instantly saved ~50%.

Information on VM sizes is available here.  If you’re sizing for a workload that requires high storage throughput take care to check the disk IOPs and throughput measurements.  You don’t want to under size your VM, but you don’t want to over pay either.

When sizing for high CPU performance check the compute benchmark scores as the CPU performance varies between VM series.

If you want to resize a VM, Azure Automation is a great way, see here for example code in PowerShell.

Right size disk

If you use the Azure portal to create a Windows Server 2016 VM, the default disk type is premium SSD.  A 128 GB  premium SSD disk is £16.16 a month.  If you don’t require a single instance SLA, or high performance, you could use a standard SSD disk at £7.15 a month + transaction costs.  Again, this is a ~50% saving.

Information on disk type is available here.  If you chose to use premium storage for performance reason be sure your workload can utilise the disk fully.  Information on how to monitor this is available here.

Managed disks allow you to switch between the disk types, e.g. standard HDD, standard SSD and premium SSD.  You can use Azure Automation to automate the change, see here for example code.

Right time

Once you have the right VM and disk types think about when you need to run the VM.  If you have a dev/test workload you could use automation to only run the VM during the working day, 08:00-18:00.  By running the VM for 10 hours a day rather than 24 you can save significantly on the compute costs.  Note that you continue pay storage costs when the VM is turned off.

From the VM blade in the Azure portal you can configure auto-shutdown to turn of the VM at a set time each day.  For more advanced start/stop scenarios look for PowerShell solutions such as this.

Reserved Instances

Reserved Virtual Machine Instances enable you to make significant savings on compute costs.  The saving varies by VM series and the duration of the reservation, but 1 year reservation for a D2s v3 VM is 36%, and for a F2s v2 it’s 24%, both significant savings.

Clean up

Don’t waste money on resources you no longer need.  As mentioned earlier, even if you turn off a VM you still pay storage costs.  If you delete a VM the disk is left behind, again costing money.  Azure Automation is a great way to identify and remove unattached disks, see here for example code.  Don’t forget to look for other resources that are no longer used, e.g. unattached public IP addresses.
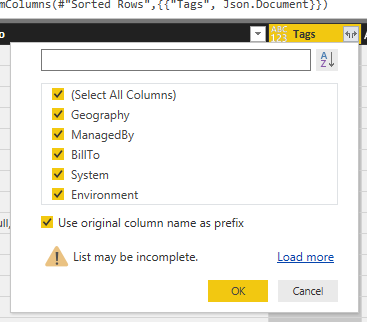
Tagging

When you create a resource group, add appropriate tags to enable you to identify the system, owner and role for the resources contained with it.  Use automation to cascade the tags to all resources within the group; example code is available here.  You can then use Power BI as I describe here to create detailed reports on usage by tag, resource type etc.  Combining tagging with Power BI is a very powerful combination.

SQL Server backup performance on Azure Premium Storage

In this post I’ll show the results of some basics tests I carried out to identify the optimum number of SQL Server backup files to use when backing up to an Azure Premium Storage P30 disk with two different VM sizes.

The tests were carried out using SQL Server 2016 Standard SP2 on Windows Server 2016.  All drives were formatted with a 64K allocation size and backup compression was enabled.   The database was 123GB with 9GB free space.

The virtual machine configuration was:

  • DS14-8 v2 8 cores and 112GB RAM
  • 1x P30 with read caching enabled for database data files
  • 1x P30 with caching disabled for database log files
  • 1x P30 with caching disabled for backup files

The DS14-8 v2 supports 51,200 IOPs and 768MBps throughput, so has capacity to support the 15,000 IOPs and 600MBps that the 3x P30 disks can generate.  The results show that only two backup files are required for close to peak performance.

1 backup file: 152.648 MB/sec

2 backup files: 192.484 MB/sec

4 backup files: 198.223 MB/sec

8 backup files: 194.735 MB/sec

I then resized the VM to a DS13 v2, to see if the reduced VM storage capability would impact the backup performance.  The DS13 v2 has 8 cores, 56GB RAM and supports 25,600 uncached IOPs and 384MBps throughput.  The IOPs capability is sufficient to support all three P30 disks, but the throughput could be limiting.  However, the results show very little difference.

1 backup file: 150.416 MB/sec

2 backup files: 192.969 MB/sec

4 backup files: 194.692 MB/sec

8 backup files: 194.561 MB/sec

Monitor Azure events with Logic Apps – follow up

Following on from my earlier post “Monitor Azure events with Logic Apps” I’ll now show how to add additional control within the Logic App to only alert on events related to virtual machine changes and how to surface additional event information in the email.

Firstly edit the Logic App in the designer and click the + between the event and email steps and choose Add an action.

EG0

From the Choose an action screen select Control.

EG1

Select Condition.

EG2

Click into the “Choose a value” box, select Expression and enter triggerBody()?[‘data’][‘operationName’] and click ok.

EG3

In the next box select “is equal to” and in the value box enter Microsoft.Compute/virtualMachine.

EG4

Drag the “Send an email” action into the “If true” box.

EG5

These changes ensure the Logic App will only send an email for operations related to virtual machines.

If you would like to include additional event information in the email beyond those in the Dynamic content selection it’s easy to achieve.  From the Logic App page click on runs history.  Click on “When a resource event occurs” and you can see the JSON on the event. Click “Show raw outputs” to see the full JSON generated by the event.

EG56

You can include values from the JSON in the email using the expression box.  Go back to the “Send an email” action and click on the email body.  In the Expression box enter the path to the JSON value, e.g. triggerBody()?[‘data’][‘operationName’] to include the operation name or triggerBody()[‘data’][‘claims’][‘http://schemas.xmlsoap.org/ws/2005/05/identity/claims/name’%5D to include the name of the user that carried out the action.

EG7


Monitor Azure events with Logic Apps

In this post I’ll provide a starting point for monitoring Azure with Logic Apps whereby an email is sent when a successful change is made within an Azure subscription.

To start with, check the Event Grid resource provider is registered within your Azure subscription.  You can do this in the Azure portal under Subscriptions -> Resource providers.

EventGrid0

Next, create a Logic App from the Azure portal, entering a name, resource group and location.

EventGrid1

From the splash screen select the common trigger When a Event Grid event occurs.

EventGrid12

Click the sign in button to connect to your Azure subscription.

EventGrid13

Select your Azure subscription, resource type and resource name.  In this example I’ve selected the subscription, for event monitoring across the entire subscription, but you can choose resource group or something else to scope the alerts further.  I’ve also added an event type filter for WriteSuccess, but again you can adjust as per your requirements.

EventGrid14


In this example I’ve chosen to be notified by email, so click on new step, then select Office 365 Outlook, followed by send an email.

EventGrid15

Populate the email body with event information that interests you.

EventGrid16


Save the Logic App, then make a change, e.g. resize a VM or create a resource within the subscription to trigger the alert.

If you don’t receive an email check the runs history on the Logic App page.

EventGrid17

If nothing is listed check that the Logic app automatically created the Event Grid subscription.  Search for Event Grid subscriptions in the Azure portal.

EventGrid18

If nothing is listed re-register the EventGrid resource provider in your Subscription.  I did this using Azure Cloud Shell Register-Azure RmResource Provider -ProviderNamespace Microsoft.EventGrid.

EventGrid19

Once you have the basics working you can customise further, e.g. to only notify for changes related to virtual machines.  In a future post I’ll show how to do this.

Renaming Azure automation accounts

As of Aug 2018 it’s not possible to rename an Azure automation account, but this is the next best thing.  There are number of limitations to this approach, including the requirement to recreate schedules and a number of other automation account settings and configurations, but if you have a simple setup it’s worthwhile.

  • Bulk export the runbooks from the incorrectly named automation account using the Export-Azure RmAutomation Runbook PowerShell cmdlet.
  • Create a new automation account with the desired name.
  • Bulk import the exported runbooks into the new automation account using the Import-Azure RmAutomation Runbook PowerShell cmdlet.  Use the -Published switch to save time having to manually publish each runbook post import.
  • Recreate and link any schedules and other configurations.
  • Import any modules required by your runbooks.
  • Update the existing modules as they’re not the latest available when you create the account.


Working with Azure tags in Power BI

Using tags in Azure is a great way to logically organise resources by categories.  Combining tags with the Power BI Microsoft Azure Consumption Insights connector should offer a powerful way to analyse and gain insights into your Azure expenditure.

AzurePowerBI1.png

Unfortunately, the connector imports the tags as a single field containing the tagging JSON, which makes it difficult to work with the tags in a meaningful way.  For example, if you have tags called System, Geography and Environment it would be great to be able to work with these in Power BI as an individual fields.  Fortunately, this is possible, but not with Power BI in the browser.

Download Power BI Desktop  and get data from the Microsoft Azure Consumption Insights (Beta).

AzurePowerBI2

Enter your EA enrollment number, which you can get from https://ea.azure.com/ .  You’ll also need an API access key, which is available from https://ea.azure.com/ under reports -> download usage -> API access key.

Select UsageDetails, then right-click and select edit.

AzurePowerBI3

If you’ve only recently added tags order the data by date descending.  This is because the Power BI editor loads 1000 rows initially and if you’ve only recently started using tags they’ll only be listed against recent records.

Find the Tags column, right-click choose Transform, followed by JSON.

AzurePowerBI4

Power BI will now parse the JSON and enable you to split out each tag into a separate column.  Click on the arrows and the tag fields will be loaded.

AzurePowerBI5

AzurePowerBI6

Click ok to add the new tag fields to the data set, followed by close & apply.

AzurePowerBI7

You can now work with each tag individually.

AzurePowerBI8

Azure VM Agent Status – Not Ready

In a secure sandbox environment withing Azure I encountered and issue whereby the Azure VM Agent status was reporting as not ready and the agent version as unknown.

Agent0

Opening the VM Agent log in C:\WindowsAzure\Logs\WaAppAgent.log I saw the error:

[ERROR] GetVersions() failed with exception: System.ServiceModel.EndpointNotFoundException: There was no endpoint listening at http://168.63.129.16/?comp=versions that could accept the message. This is often caused by an incorrect address or SOAP action. See InnerException, if present, for more details. —> System.Net.WebException: Unable to connect to the remote server —> System.Net.Sockets.SocketException: A connection attempt failed because the connected party did not properly respond after a period of time, or established connection failed because connected host has failed to respond 168.63.129.16:80
at System.Net.Sockets.Socket.DoConnect(EndPoint endPointSnapshot, SocketAddress socketAddress)
at System.Net.ServicePoint.ConnectSocketInternal(Boolean connectFailure, Socket s4, Socket s6, Socket& socket, IPAddress& address, ConnectSocketState state, IAsyncResult asyncResult, Exception& exception)
— End of inner exception stack trace —
at System.Net.HttpWebRequest.GetResponse()
at System.ServiceModel.Channels.HttpChannelFactory`1.HttpRequestChannel.HttpChannelRequest.WaitForReply(TimeSpan timeout)
— End of inner exception stack trace —

Research showed that the IP address 168.63.129.16 is a virtual IP address used for Azure VM Agent communication amongst other things.  See here for more detail.

In this case traffic was flowing through an Azure security appliance and a rule needed to be created to allow traffic to and from 168.63.129.16.  Once this was done the VM Agent functioned correctly.

Unable To Upload Templates With Joomla Running On Windows Azure

If you create a web site on Windows Azure using the Joomla! 2.5 template you may find that you’re unable to upload templates.  This is because the Joomla! template tmp_path and log_path parameters point to unwritable locations.

To change the tmp_path and log_path parameters, open your site using the Microsoft WebMatrix toolkit, then open configuration.php.

Joomla1

Within configuration.php locate the two parameters.

Joomla2

Change the parameter values as below, substituting YourWebSiteName for the name of your web site.

public $tmp_path = ‘C:\\DWASFiles\\Sites\\YourWebSiteName\\VirtualDirectory0\\site\\wwwroot\\tmp’;

public $log_path = ‘C:\\DWASFiles\\Sites\\YourWebSiteName\\VirtualDirectory0\\site\\wwwroot\\var\\logs’;

Joomla3

Save your changes.